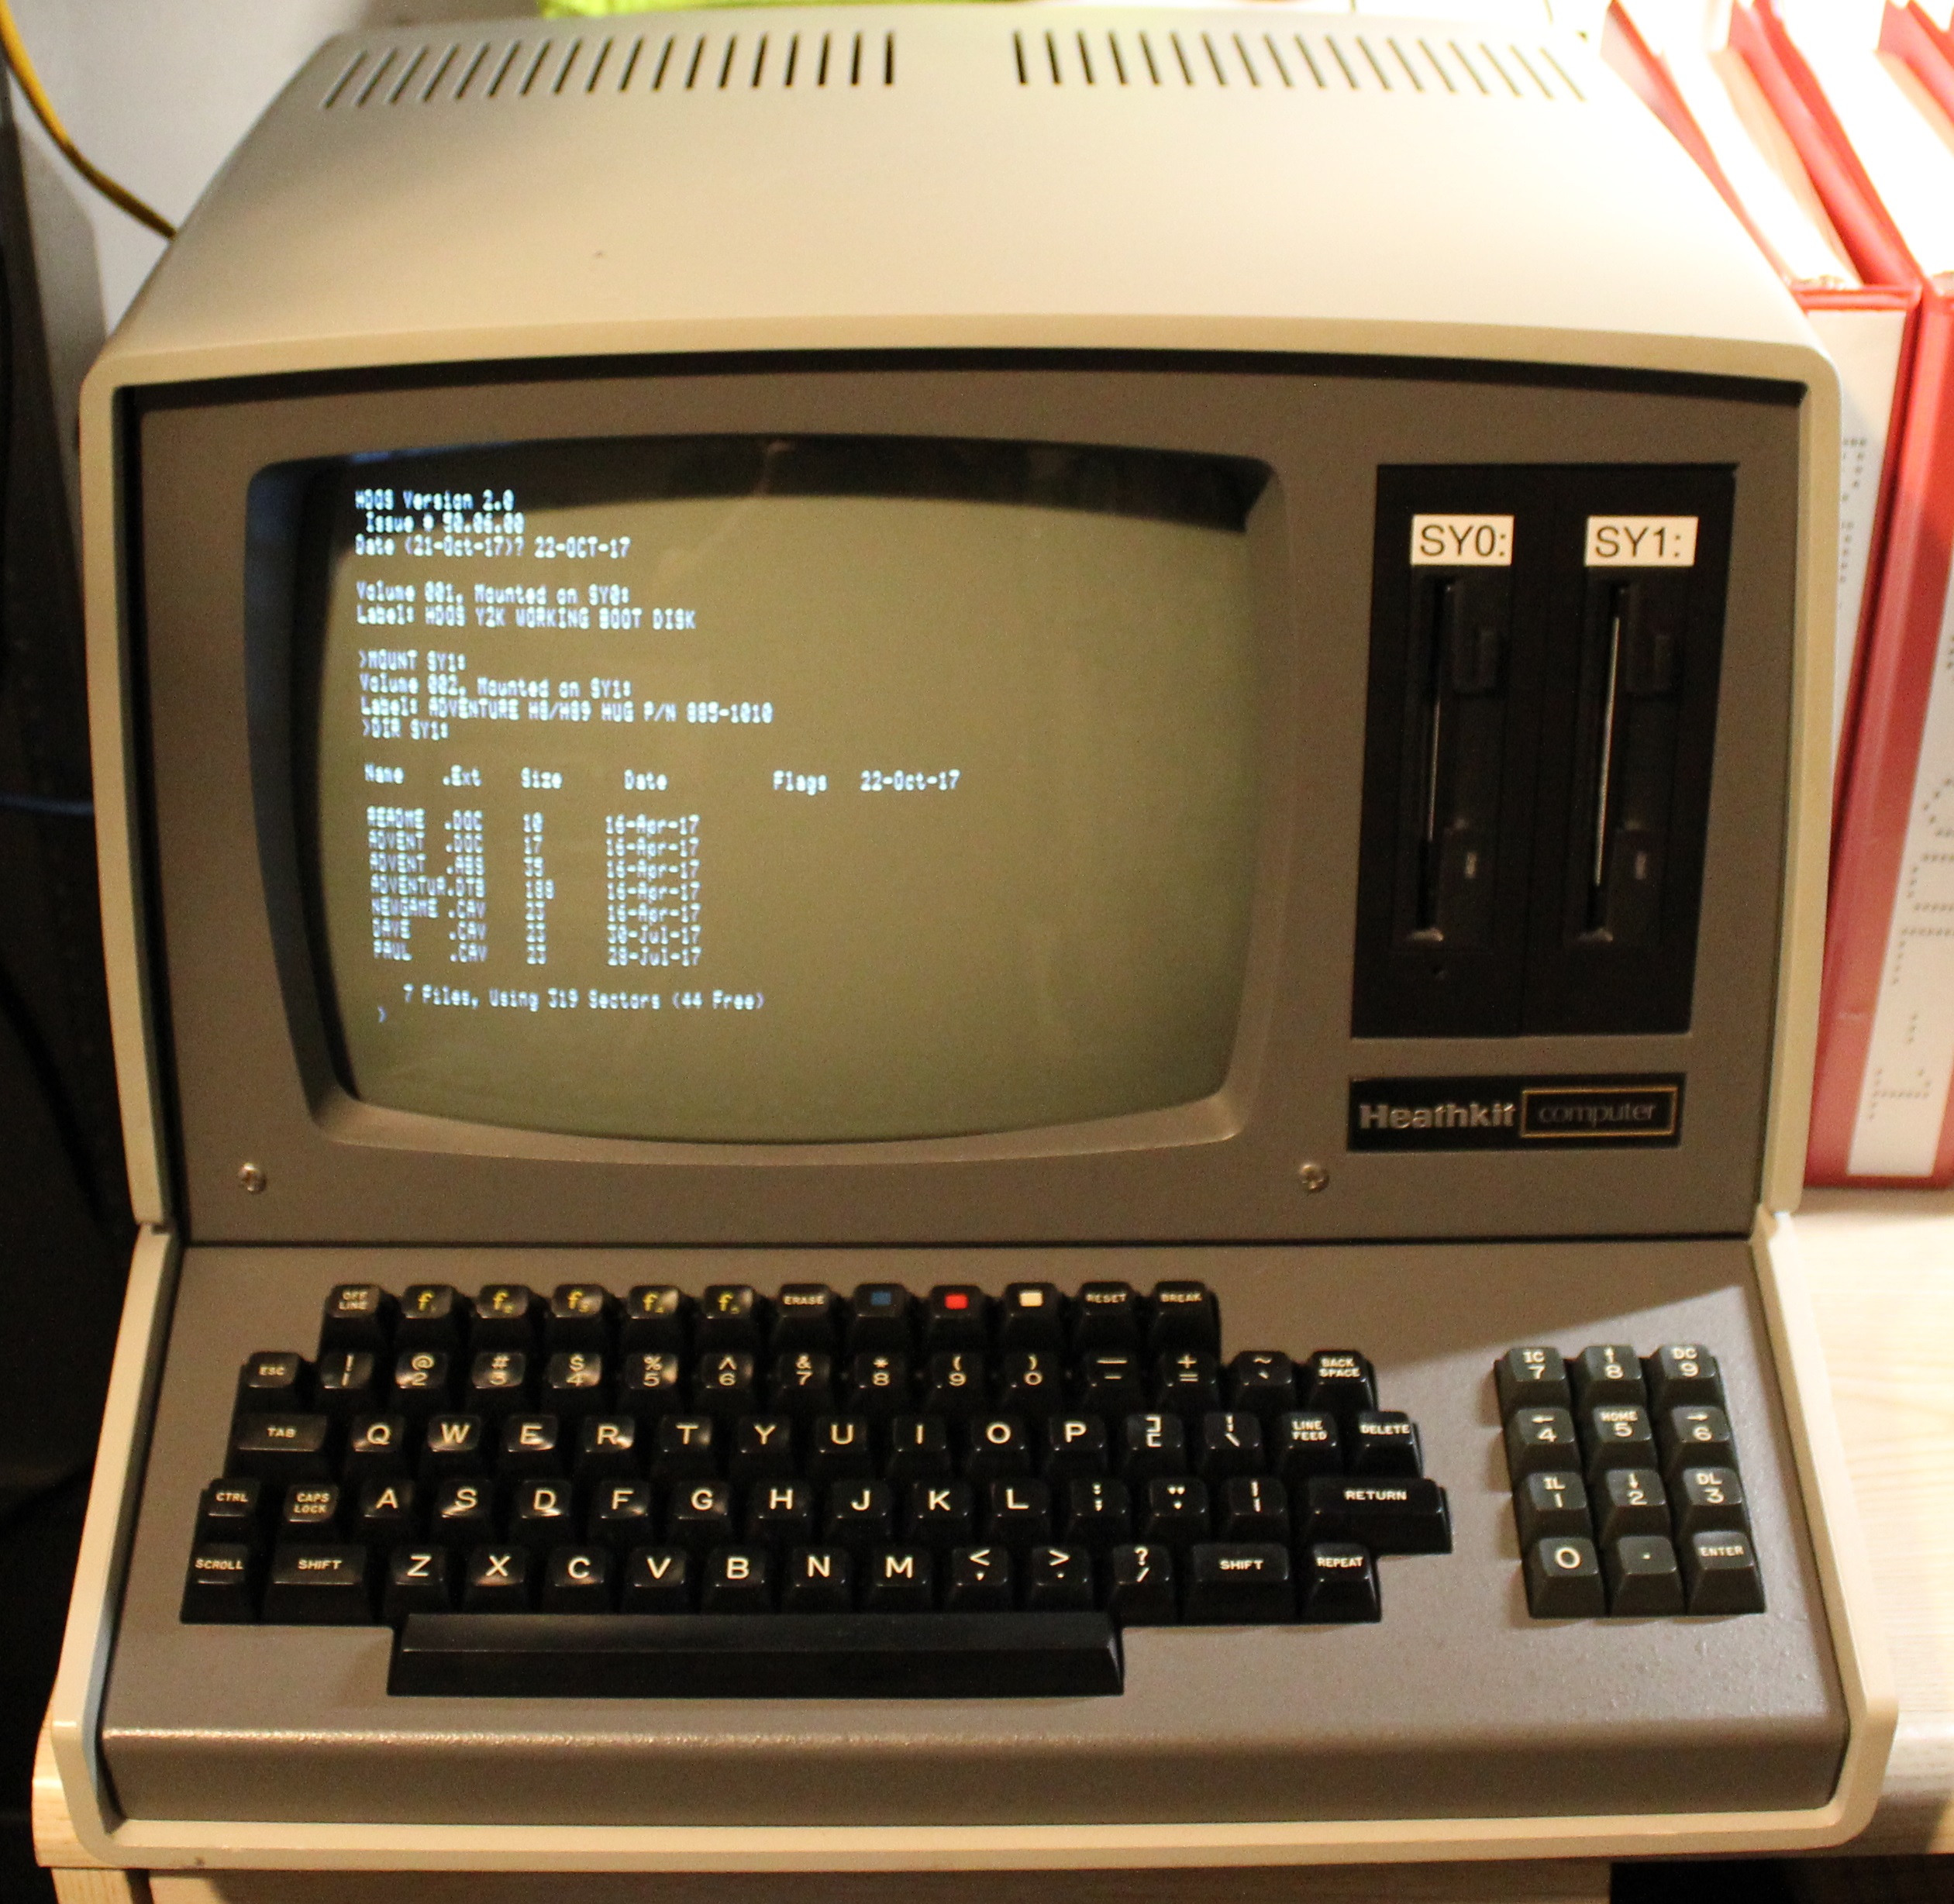
So as you can see from the above picture, there has been some good progress on of my H89 restoration.
Updated the power supply to add three TO-3 heat sinks to both the 5 volt and the one 12 volt DC regulators - This upgrade was done on later releases of the H89 systems to help keep each of the voltage regulators running within their safe operational temperature ranges.
Retrofitted 12-AWG stranded wire between power supply and main CPU board - During my testing, I found that many of the ICs on the main CPU board where only receiving about 4.3 volt DC as measure at their power pins. Looking at the voltages being generated at the power supply showed a good 5.1 volts. It tuned out the wire being used to provided DC power between the CPU board and the DC power supply was only 22-AWG. The CPU board, with all the extra card plugged in to the bus, requires 1.35 amps of current on the 5 volt supply. The measured voltage drop found in the 22-AWG wire was 0.7 volts. I removed the too light 22-AWG wire and upgraded to 12-AWG stranded wire for both the +5 volts and power ground return. With the new wire in place, the measured drop is now only 0.05 volts and the worst supply voltage to an IC on the boards is 4.95 volts.
Retrofitted two 3.5 inch floppy drives along with a Virtual Sector Generator - I retrofitted two new 720K, 3.5-inch floppy drives in place of the very dead, single, full height, 5 1/4 inch floppy that came with the H89. Since 3.5-inch floppy drives are not know to support hard-sector disks some form of sector generator needed to be added to simulate the required hard-sector pulses needed by the H89's floppy controller card. On my H8 restoration project, I tested several designs that generated the needed hard-sector pulses. I settled on Mike Douglas' (not the actor)
Virtual Sector Generator (VSG) from DeRamp.com to fulfill this role for both my H8 and now my H89 projects.
Repaired the two CRT mountings posts damaged in shipping - I needed to install two 1/4-20 x 3 inch stainless screws through the case front. Unfortunately during the shipping of the H89 from Florida, two of the four CTR mounting posts had broken of close the the case's front bezel. When I opened the H89 case, I found the the CTR was hanging from only the two top mounting posts which seemed to serve for some reason. Since the H89's case was high density foam, I felt that just using glue would not last given the weight of the CRT. While I did not like drilling two hold through the case, I reasoned that having a good stable mounting base for he CRT was more important than the violation to the original case.
Replace one bad 16-pin IC socket in the DRAM area - Along with the normal tarnishing of the IC pins and sockets found on systems that are over 35 years old, there was one flaky SRAM location. This problems even continued are all the IC where removed from the system and the tarnish was cleaned off each IC's pins. Replacing the affected back of DRAM did not fix the problems. In the end it turned out to be a completely corroded pin on one of the IC sockets. The socket was removed and replaced and the original DRAMS re-installed.